¶ Project Lifecycle and Project Manager Tasks
This guide will be a complete, start to finish guide for both new and old PMs. The goal for this guide will be to bring the user project success as long as each step in this guide is followed in detail. There will be as much detail per step as possible and can get very specific to ensure you pass your PM Audits. The guide will be broken down into 5 individual phases. The link below contains a visual representation that is similar to this guide.
- Sales Handoff
- Discovery
- Development
- Pre Go-Live
- Support
¶ General Phase-Free Requirements
¶ Meetings
As you proceed with your project you will have a plethora of meetings and will be expected to set them up appropriately. This section will provide you with the details we expect to find in each meeting unless specified otherwise.
Agendas: Even if the meeting is a simple check-in, there should always be an agenda established and shared with the Client through Outlook. The Template provided below will require you to create copies for each client and change anything necessary to match the Client's name, meeting type, and dates.
[CLIENT]- Project Status Meeting Agenda & Notes 20211231.docx
The preferred place to store each agenda is pasted into the body of the meeting invite or preferably, attached as a word document (template provided above) to the meeting so you can use that agenda as a starting place to take notes.
Meeting Notes: It is currently required that meeting notes with clients be posted to basecamp for the client to review. Or, if a particular client refuses to use Basecamp email them the meeting notes shortly after the meeting.
Any project that has active development going on for at least 2 sprints, needs to have a recurring meeting with the client at a minimum interval of once every two weeks (Bi-weekly).
Project Managers use Microsoft Teams to conduct their meetings. This is a great way for the PM to be able to quickly join a call if they are on back-to-back meetings and allows the dev team to join remotely too. It also allows for automated transcription of the call which is a huge time saver if a project manager needs to shore up notes. Recordings are mandatory for all meetings and should be stored in the project's Files and Documents area of Basecamp. Using another screen share, unless explicitly requested by the client, will require the OPs and Management team to be notified before proceeding.
¶ Sales Handoff
The sales handoff phase of a project will occur when you receive an email or conversation from Ops or Leadership regarding your assignment to a new project. With these next few steps, the project will become much easier to understand.
¶ Step 1 - Project Agreement
During the initial phase, a completed Sales Handoff document will be added to the project's Teams channel. The team's channel is set up by the Ops team. Read this document carefully as it will contain critical pieces of information that we will want to store internally.

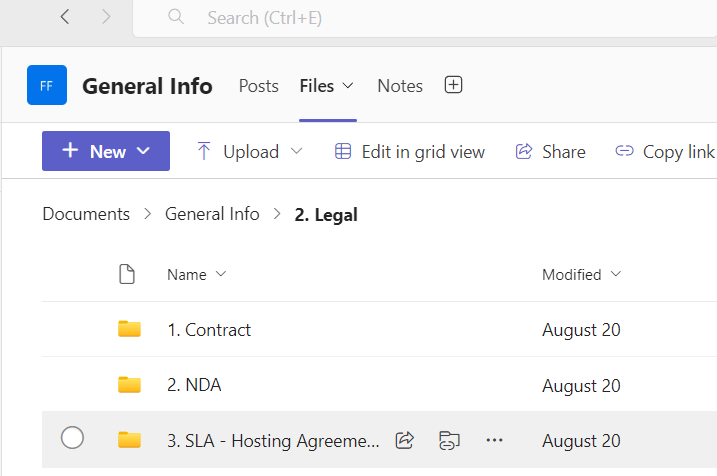
After reviewing the sales handoff document, review the attached Clarity Agreement. The contract can be found under ""Files-->Legal" in the Project's Teams Channel. 503b47c2-45c5-4f47-a8e9-7d8d173f41d1.png
Ops will have reviewed the contract, but you can always double check these things:
- Make sure the Agreement has been signed (Executed) by BOTH parties.
- Ensure you fully understand and have documented any deviations from our Standard Contract. Don't worry this guide will show you how.
¶ If the PM needs to take this on, which would be rare, here are the resources you will need for this step:
Check for Differences in our Agreements
Use the steps in the "Check for Differences in our Agreements" Nuclino article and once complete document those changes you find and determine if the changes are minor or if worth escalating to management.
¶ Step 2 - Setting up a New Project in EP (REQUIRES THE FIRST INVOICE TO BE PAID BY CLIENT)
Setting up a new project in EP is done by the Operations team. Reach out to them regarding this project setup. The acronym will also be created by the OPs team.
NOTE: When creating the project in EP, your activities (sometimes referred to as "line items") will preferably be created by the FEATURE this will help ensure an easier time for developers to mark their time. Features are easily identifiable in Azure DevOps due to their purple trophy icon.

¶ Step 3 - Setting up a New Project in Basecamp
Each Basecamp project is set up by Ops.
Recently we have established a new basecamp template that contains a very detailed breakdown of what is required and To-Do's needed for project success. It is in your best interest to utilize those templates to save you time and prevent any important steps from being skipped or forgotten.
¶ Step 4 - Vault Warden
Vault Warden is a very powerful tool for Project Managers and Developers alike to share and maintain accurate and important credentials, information, and Project Quirks.
Ideally, if the Vault Warden is kept up to date properly, a new PM should be able to pick up where you left off with little extra effort.
- Note: It is helpful to keep information in Vault Warden as concise as possible.
Here is a small list of recommended items to keep within your Vault Warden for each project:
- VPNs
- URLs
- Credentials
- Server information
- Client Details
- Timeline Details
- Document Links
- Contract Details
- Any other Important Unique Project Information (What makes this project special?)
¶ Step 5 - (OPTIONAL/IF NEEDED) Setting up a New Client Team in Teams
This step is completed by the Ops team. Creating a New Client Team
¶ Step 6 - Client Kick-off Email
This email should be a templated email sent to the client for introductions, setting up the initial client-facing kick-off call, and eventually the discovery calls which should be set up in a series of weekly meetings.
INSERT COPY OF SAMPLE EMAIL HERE
¶ Discovery
In this phase, you will be working with a team comprised of Business Analysts, Portfolio Managers, and other team members as needed.
The Discovery phase can be broken into these key steps:
- Client Introduction Meeting
- Discovery Meetings - There should be at least four
- Design Meetings - Usually only two
- Estimates Meeting
- Sign off
¶ Project Kick Off Call:
This is where you should take the opportunity to demonstrate what the client should be able to expect in the future and what you will need for project success.
The Kick Off call will review:
- Clarity Leaders and Project Team
- The project's terms and estimated timeline.
- Brief Review of Basecamp
- Conversation and Decision about Triple Constraints Pyramid
¶ Discovery Meetings
"Discovery" is a series of meetings used to ensure we have all the client's project requirements. In most cases you will schedule the Discovery calls for the client team members and the Business Analyst.
Your project's Business Analyst (BA) will lead the 4 (or more if needed) Discovery calls.
Discovery is a complex time for a project as there are multiple processes that need to be followed depending on the project and its needs. Please follow each of these steps depending on your individual project needs.
¶ Integration
- Request a demonstration of the application's use.
- Have a discussion with the client on the data needs for this application.
- Provide the client with a blank mapping document for them to fill and provide us. (We only need their system information we can fill in our own.)
- Document any considerations for NEW feature data and integration requirements.
- Finish Detailed mapping and integration workflows.
- Ensure all risks are documented in the BRD
¶ User Flow
- Identify each user type and walk through the ideal user experience
- Discuss any special circumstances and edge cases.
- Document user flow end to end.
¶ Workflow and Business Logic
- Walkthrough of the normal Business Process
- Discuss desired changes to the current business process.
- Generate Workflows and Sequence Diagrams
- Identify CEF Features affected by the Business Logic
- Identify Email needs, Checkout Scenarios, Shipping Scenarios, Tax Scenarios
- Determine Payment provider, Shipping provider, and Tax provider.
- Associate Business Logic to User Flows.
¶ Designs
- Schedule Internal Design Team Meeting Prep (You should be sharing resources with the design team here.)
- Design meeting(s) scheduled and held with Client, PM, BA, and Design team.
- Request branding Guide and Information used to create header and footer
- Designer generates basic wireframes for new features
- Verify features and wireframes are congruent.
- Get designs signed off by the client
- Add confirmed designs to features and user stories in BRD
- Wireframes once completed should be sent to the Markup Team.
During the Discovery phase, the project will meet in a weekly or bi-weekly cadence to review the BRD and provide feedback.
Basecamp will contain pre-made to-do lists. For a project's success ensure all client To Dos are completed as soon as possible and preferably before the Re-estimates meeting.
- Mapping files should be completed and sent over to our team as soon as possible. These mapping files will change depending on the project. If the project has some sort of integration, a mapping file will be required. If a system will be connecting to CEF, we will only need the mapping information from their system that is going to be utilized with CEF. We can fill in our own system information.
- Credentials should be obtained ahead of time and documented in the Teams Channel's Wiki. This includes:
- Shipping provider Key and Credentials
- Tax Provider Key and Credentials
- API and a Sandbox Environment Access and Credentials.
- SMTP Server Credentials
==The Discovery Process is fairly compact and will require a handful of meetings. Here are the ones you should ensure are happening on most projects:==
- ==Setup a Recurring Discovery Meeting==
- ==Review version 1 of the BRD==
- ==Review the Workflows for the project==
- ==Setup a design meeting with Will Swain==
- ==Obtain any Branding Guides or Design Files==
- ==Establish acceptance criteria for user stories and features in the BRD==
- ==Get BRD Sign off and Continue to the Re-estimates portion of the guide.==
¶ Re-estimates Meeting
Once the FSD has signatures from both parties and is ready to continue, we will want to move on to establishing a Re-estimates meeting. In this meeting, we will be adjusting the estimated hours and costs that were provided with Sales with a more accurate representation of the work required and the difficulty of the project.
It is at this point that we will want to establish a timeline estimate. Here we will break down the Features of the FSD and provide estimates based on the work required. The key phrasing to use here is that this document is an estimate and while we will do our best to achieve that estimate we cannot guarantee a deadline. If a deadline is a make-or-break situation for the client, please reach out to management for further instructions or offers we can provide.
¶ Sign Off
Final sign-off will make sure everyone is on the same page at this point before starting the project. This document (or a copy of exact verbiage) should be presented to client in BC. Client Re-Estimates & Move Forward Approval
Client sign-off via BC (at minimum) must be obtained before beginning work.
With these steps completed, you will be ready to start development.
¶ Development
In this phase, you will be working to complete the project in the timeline, budget, and scope the client requested. Normally you will want to find out which two of the three mentioned constraints the client cares about the most. It's important to note, you may get a vague answer as to which of those they care about most. But your goal should be to have the client lockdown the two most important. The reason being we can hit almost any timeline and budget if we have the ability to remove the scope from the project. We can keep budgets low if we can move slower and or reduce scope. Essentially the goal is to find what piece we can be flexible on to meet the other requirements.
¶ Timeline (Gantt Charts)
While timelines/Gantt Charts are not a requirement for all projects (might change in the future) it is highly recommended to make one for all of your projects (Besides projects in support) and there are templates prepared to help you generate them. Below you can find the CEF Gantt Chart as well as the Connect Gantt Chart. While similar they each have tasks and tweaks made to help improve your ability to create them, as well as maintain your Gantt Charts.
Connect Project Timeline - Estimate.xlsx
NOTE: Got Gantt Chart fever? Try making a General Progress Gantt Chart that contains all of your Projects, with their estimated timelines, and if you want you can link all of your Gantt charts to that single excel spreadsheet to help keep you organized.
¶ Budget
¶ Scope
One of the biggest reasons projects go wrong is due to "Scope Creep". Clients tend to push for new requirements and features not originally agreed upon.
Even in the event where the client will agree to pay for the new requirements or features, we need to ensure the client acknowledges the impact their new requests will make on their Timeline as well as their Budget it can be easy for the client to disregard that impact, and it is your job to clarify how this will change the project as a whole. Determine the costs (with a mandatory Change Request Document) and how much extra time will be needed to add those requests (demonstrating this impact with the mentioned Gantt Chart would be easiest).
¶ Change Requests
Change requests for any changes are required. Either the client or clarity can initiate these documents, and you will typically find that clarity will initiate these more commonly. There are a few key details to be mindful of when creating a change request:
- The change request should contain developer-provided estimates for the new work.
- Notify the client that the work hours estimated in the document are nothing more than estimates. This work should never be agreed to be a "No more than" document.
- No work should be completed without an agreed-upon change request and typically the following invoice needs to be paid. This will depend on the client relationship and if it would improve client satisfaction it may prove valuable to discuss move faster with management.
- Project management, QA, and Meeting time will be required on all change requests as they will almost always require some PM input and QA time. These hours will almost always be added in preemptively with a formula. This formula should be found already in the standard Change Request document.
Below is the following process for change requests. These change requests should be reviewed by your Portfolio Manager to ensure accurate estimates and proper expectations are set.
¶ Pre Go-Live
In this phase, we are wrapping up the project and have nearly completed all tasks in the IIW. This includes reviewing most if not all of the QA Failed tickets.
The first step after the development phase is to get the client to start testing their project themselves to ensure both the client and clarity have met the requirements laid out in the IIW.
This process is referred to as UAT or User Agreement Testing. This is not to be confused with QA or Quality Assurance, which is an ongoing, internal process to ensure we are meeting our own testing standards.
UAT should be more detailed and should last for a few weeks. If the client would like to Go-Live with what they currently have, we can proceed with that request after getting a written agreement with the project's status and they will want to review the SLA document to select their level of support which will be covered in the Support Section of this guide.
¶ Support
¶ FAQ
- I see some projects that are the same name/same project but have ECOMM, SUPPORT, or MARKETING at the end of the project. What is that and are they actually the same project?
- In some cases, the client will request that hours be tracked separately in different EP projects to help the client better understand the use of the hours.
- Sometimes, the project could actually be completely separate projects.
- In order to be completely sure, reach out to the OPs or Management Team in order to get a more concrete answer.
-