¶ What is Gitflow?
Gitflow Workflow is a Git workflow that helps with continuous software development and implementing DevOps practices. It was first published and made popular by Vincent Driessen at nvie. The Gitflow Workflow defines a strict branching model designed around the project release. This provides a robust framework for managing larger projects.
Gitflow is ideally suited for projects that have a scheduled release cycle and for the DevOps best practice of continuous delivery. This workflow doesn’t add any new concepts or commands beyond what’s required for the Feature Branch Workflow. Instead, it assigns very specific roles to different branches and defines how and when they should interact. In addition to feature branches, it uses individual branches for preparing, maintaining, and recording releases. Of course, you also get to leverage all the benefits of the Feature Branch Workflow: pull requests, isolated experiments, and more efficient collaboration.
¶ What is the Clarity Gitflow?
Let's start off with naming conventions. Every client will have their own repository set up under the CEF project for ecommerce and a CMS repository (mostly DNN). Both repos will have the same naming convention for the branches. All of our clients will be given an acronym to identify them a bit easier. So if we have a client called "American Manufacturing Company", the acronym would be "amc".
- support/clients/clientAcronym/qa
- This the the Quality Assurance branch and this will be the branch that the QA Engineers will test against for completed tickets, after they have been deployed to a QA environment.
- support/clients/clientAcronym/uat
- This is the "User Acceptance Testing" branch. After features and bugs are verified by QA, a pull request will be made into this branch and deployed to a UAT environment. The client will have visibility to this website and will complete their own verification of features and/or bug fixes.
- support/clients/clientAcronym/prd
- This is the "Production" branch. All code in this branch will have gone through the QA and UAT process. After UAT is complete, a pull request will be made into this branch and deployed to the production environment. This code is "live" and in use on a user facing/public website or application.
¶ Now that we know what the main branches are, what do we name the branches for active development?
We want to give our branches a practical name, just like functions or variables, to ensure that another developer (or ourselves) can easily identify what is in the branch or what feature or bug is being worked on.
So for instance, say I was updating the checkout process on the front end to include specific business logic for our client and the feature was to include a dropdown menu for a persons middle name on a registration form. I would then name my branch "support/clients/clientAcronym/feature/middleNameReg". You'll notice that since this is a "feature" I've added the "feature" directory to my branch.
If was working on a bug in the checkout process, lets say where the phone number field validation was failing, I'd name my branch "support/clients/clientAcronym/bug/phoneValidation".
¶ Development Life Cycle
As stated earlier, we'll merge our code into the QA branch, that will be tested by our QA team. If the code passes, it will be merged into UAT and be verified by the client. If this all passes, the code will be merged into PRD. If at any point the code fails or isn't approved, the process will start all over again.
When we start working on a feature or bug, we'll always start off with basing our work on the QA branch. At this point, you will have your local instance set up, so we won't go very in depth of cloning in this doc. There's a few things that we'll want to ensure we do before we start work.
- Ensure that we are on the support/clients/clientAcronym/qa branch
- Using CMD/PS/Terminal or any Git GUI, run the "git pull" command to ensure we have the absolute latest code
- Run any builds necessary (BE or FE). CMD/PS/Terminal or the GUI that you're using will advise which files were changed. Rule of thumb, if TS/SCSS/HTML files were changes, run a FE build. If any C# files were changed, run a BE build.
As soon as we have our latest code and everything has been built, we'll want to make our new branch based off of the QA branch.
git checkout -b support/clients/clientAcronym/feature/featureName
Now that I have created my branch "support/clients/clientAcronym/feature/featureName", I can start work. Please ensure that you're committing your work often and making appropriate commit messages. We don't want any profanity or unprofessional messages in these commit messages and we want to ensure that the message is descriptive of the feature and save point that we're at.
After the work has been completed locally and committed. then we can push our work to the remote repository in Azure. The below command will push your local branch to the remote origin and track your branch to the branch name upstream that we are passing as the last parameter in the command. Notice that we're calling the branch the same thing it is locally. This will avoid any confusion.
git push --set-upstream origin support/clients/clientAcronym/feature/featureName
We can now start the pull request process in Azure.
¶ Pull Request Process
We have successfully made our feature, tested locally, and are wanting to merge our code into the QA branch, so it can be deployed to the QA environment and tested. The first step in this process is the Pull Request.
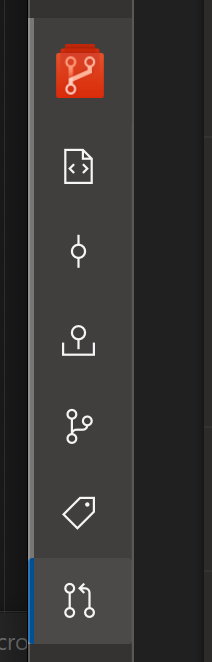
In Azure, on the left hand bar, there will be an icon (child under the orange code icon) to start a PR. It is usually the bottom icon of two timelines and an arrow pointing at the other. \
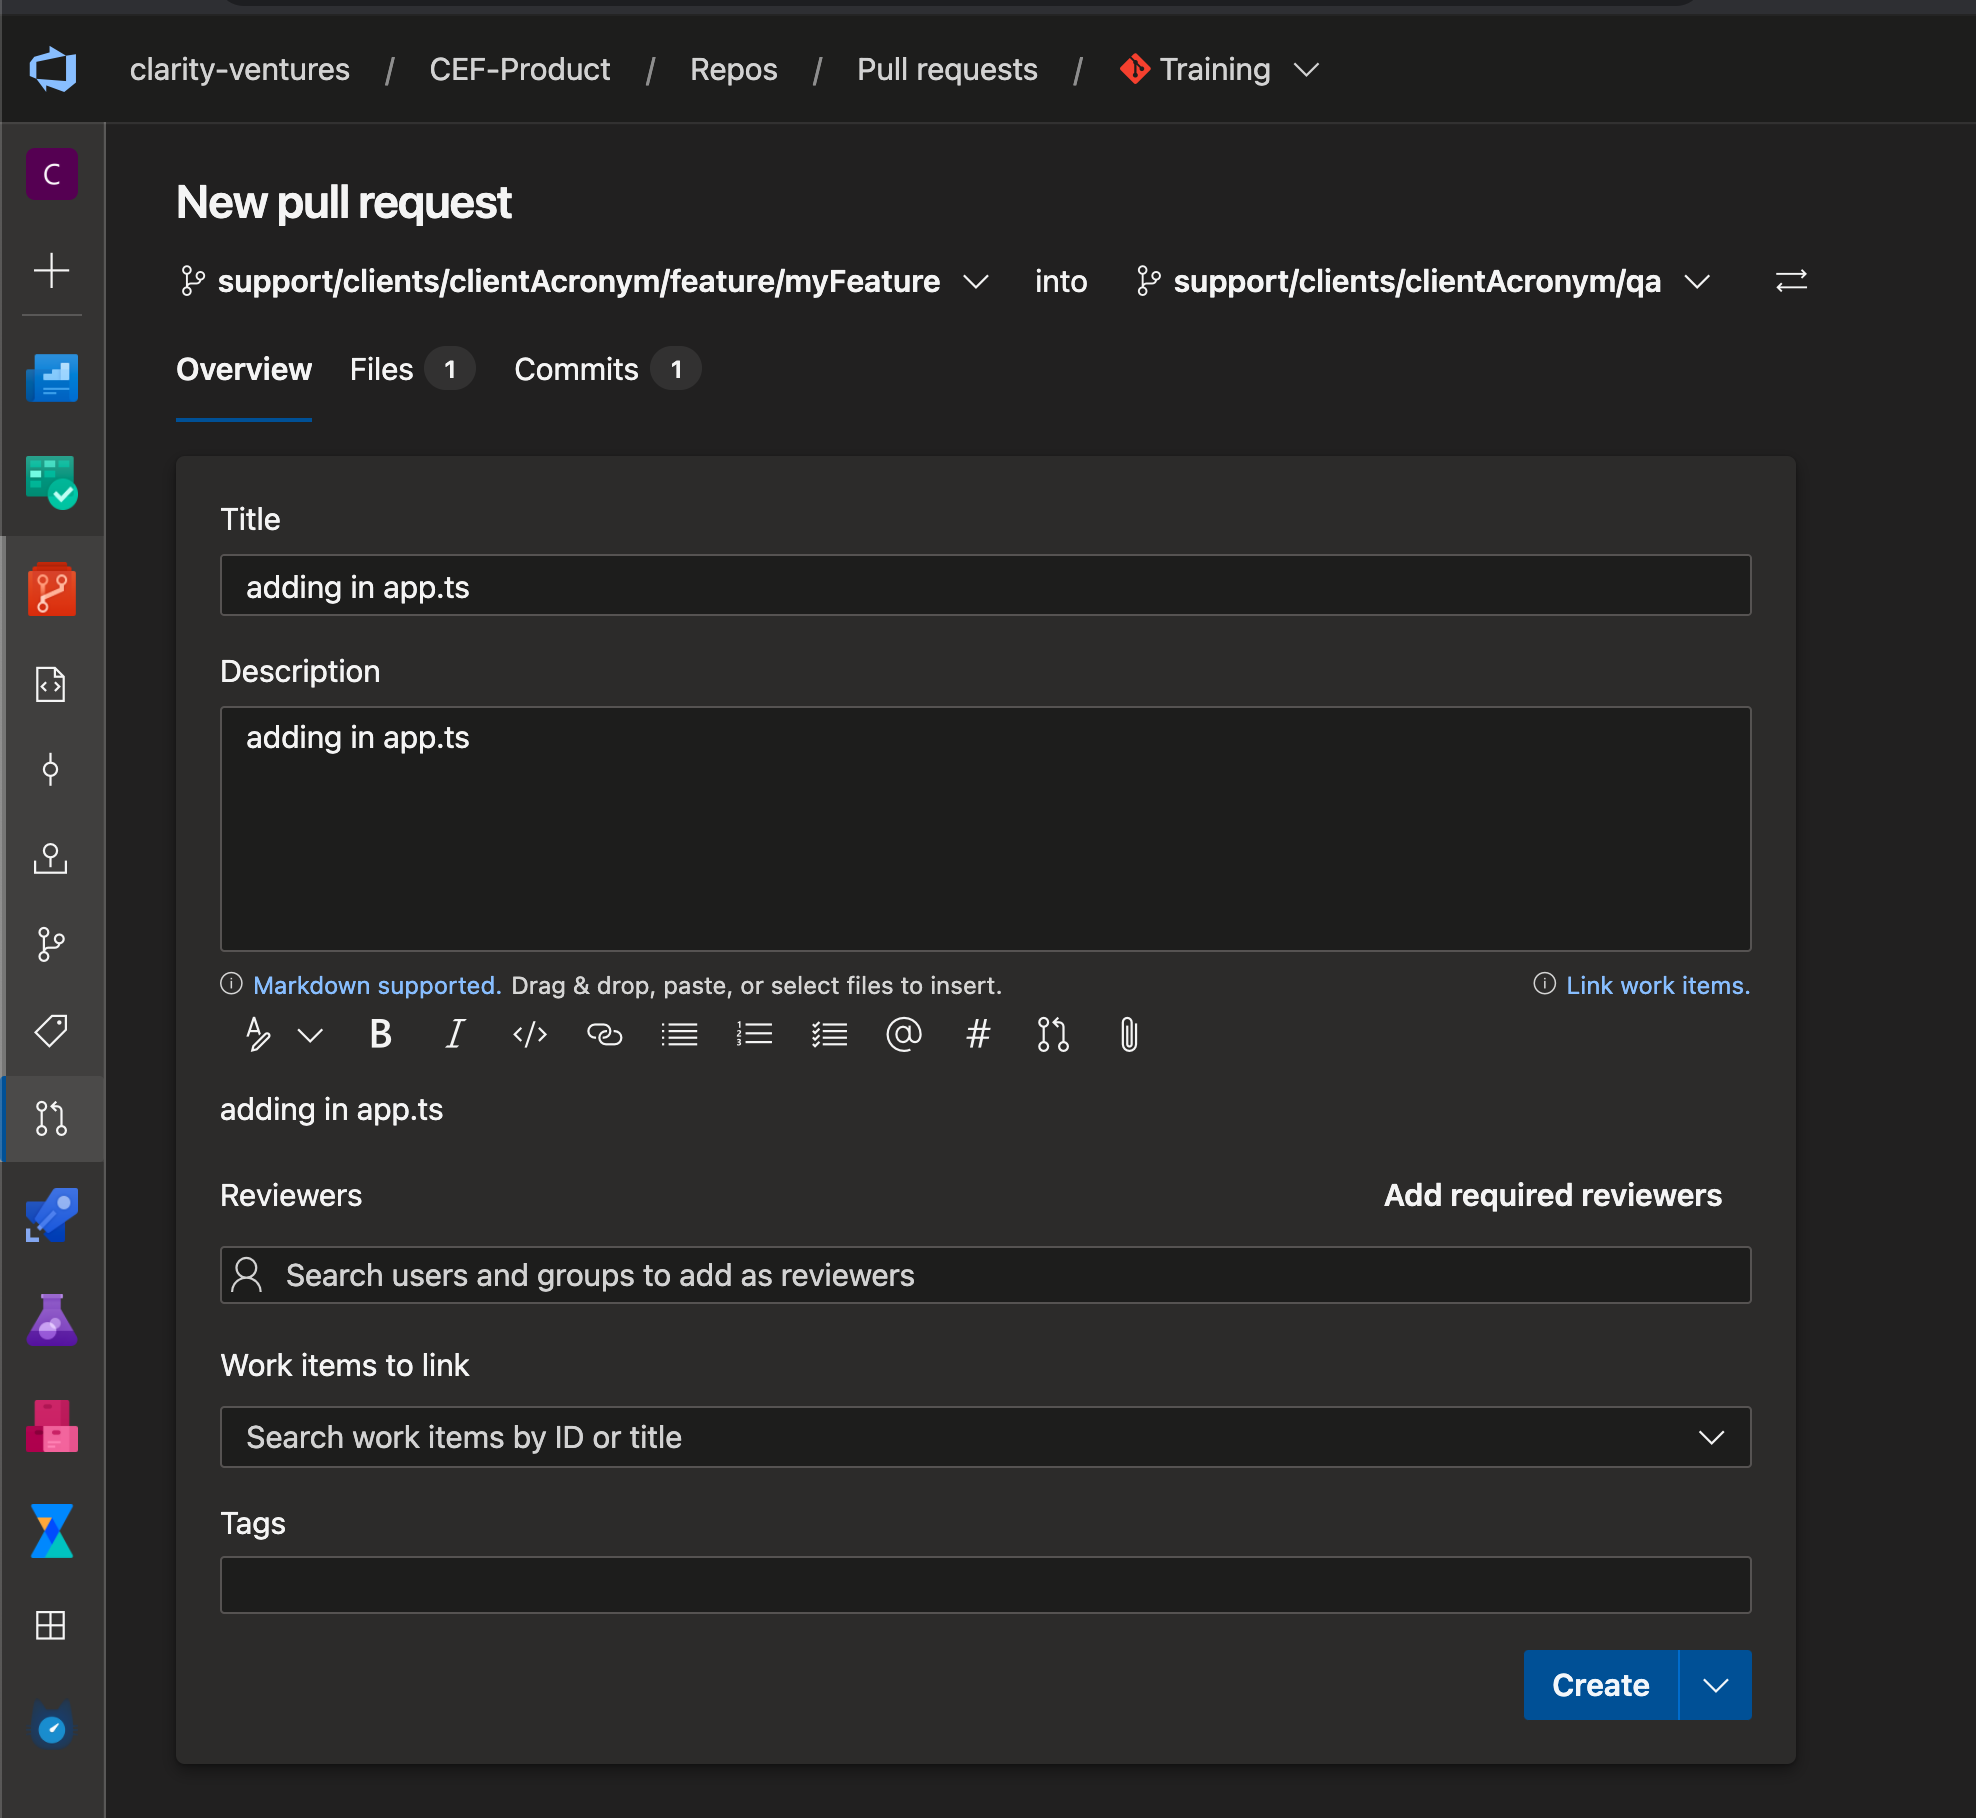
You'll then want to click the "make a new pull request" button. Next, we'll select the source branch (left side: our feature or bug fix branch) and the source branch (right: the QA branch). We'll also add in a title and short description advising what the feature or bug fix is. We can see the files added or code changed, as well as the commits of the source branch in this view. We'll need to link our work items here (task tickets in Azure DevOps) and select the "create" button below. Don't worry about adding reviewers, as the policies on the branches have required approver groups.
d0df7363-84e1-4667-9565-34198c42d22c.png
You'll want to set the "auto-complete" feature and check the box for deleting the source branch when the PR is approved. This will ensure that our repo is always free and clear of stale branches. It will also ensure that the "complete" button won't need to be hit manually, as there are multiple people that need to approve the PR and we don't want our PR hanging open, just because the "complete" button wasn't hit in the process. Azure will do this dynamically for us if we just set it up with the "auto-complete" feature. Once the PR is complete, we can then pull the latest code into our QA environment and update the affected user story tickets (Azure Devops) by selecting the "deployed to qa" state. This will notify the QA team to start testing features or bug fixes that were deployed.
The accompanied training to this documentation can be found here.