¶ System Documentation
- Getting Started - Authentication / Etc
- API Documentation - Details Endpoint Schemas
- Eclipse supports a Swagger endpoint for viewing and testing API Endpoints. You can find it via the following URL
{protocol}{IP/Domain}:5000/swagger
¶ Key Terminology
- (ARA) A Customer becomes a CEF Account + User (Faux User)
¶ Known Integrations
¶ ARA (Connect v4.6)
- Developers: (P) Austin Gregg
- Integrations: Cash receipts (Payments), Contacts, Accounts/Users, Invoices
- Current Branches
¶ Authentication
- Epicor Eclipse API allows access to the system
- Requires a User and a Password for access
- A SQL replication server allows access to Eclipse data through SQL (Read only)
- Nearly every endpoint requires authorization to access. We use an authentication called "session token authentication". In order to make a call to the endpoints, you must first create a session. Then all subsequent requests use that session's "session token".
¶ Creating a session
¶ Session Overview
All resources provided by the API are secured so that only authorized users can access the information they are allowed to view. The API relies on sessions to determine if the requesting client has access to the requested resources. Clients create a session by passing credentials in a sessionRequest to the sessions endpoint as an HTTP POST request. The credentials are authenticated by the ERP and the client is returned a session object containing a unique sessionToken value. The sessionToken is required for nearly all subsequent API requests and is used by the API to perform the actions under the security context of the session's user/client. This allows the ERP to perform things like authorization and logging under the user/client that created the session.
¶ Session Create Detail
The session creation begins with an HTTP POST request to the sessions endpoint:
http://server:5000/Sessions
The credentials are passed in a SessionRequest object in the body of the request: A SessionRequest has the following structure in JSON format:
Session Request Object (JSON)
{
    "username": "johndoe",
    "password": "opensesame"
}
So the full request information for the session creation is summarized as follows:
| Session POST Request | |
|---|---|
| Request Type | POST |
| Request URL | https://server:5000/Sessions |
| Request Header | Accept: application/json |
| Request Header | Content-Type: application/json |
| Request Body |
Session POST Request
If the request was successful, the response will be an HTTP Response containing the created session information:
| Session POST Response | |
|---|---|
| Response Status | 200 OK |
| Response Header | Content-Type: application/json |
| Response Body | {"id": "12345678", "sessionUser": { "id": "johndoe", "userName": "johndoe", "type": "Employee", "roles":[ { "id": "customermaint" } ], "companies": [ { "id": "string" } ] }, "sessionToken":"abc123abc123abc123", "refreshToken": "defdefdefdef", "applicationKey": "", "developerKey": "","clientDescription": "", "deviceId": "", "creationDateTime": "2018-10-04T17:12:41.392Z","lastUsedDateTime": "2018-10-04T17:12:41.392Z" } |
Session POST Response
If the login was not successful, an error response would be returned without any body information.
| Session Post Error Response | |
|---|---|
| Response Status | 401 Unauthorized |
| Response Body | <none> |
Session POST Error Response
The "sessionToken" contained within the response will be used on all subsequent requests to associate those calls with the validated user/session. Sessions are maintained by the server and can expire or be revoked by the server at any time. There are two errors that can occur related to the sessionToken.
| Session Error Response Codes | |
|---|---|
| Response Code | Reason |
| 401 Unauthorized | Missing/Invalid Session Token (or session user does not have permission to the resource) |
| 419 Authentication Timeout* | Expired Session Token |
Session Token Errors
*419 is the only non-standard HTTP response used by the Eclipse API for better handling of session timeouts
¶ Log Off a Session
To log off of a session, a DELETE request to the session endpoint passing the session ID is needed (including the sessionToken in the header)
| Session DELETE Request | |
|---|---|
| Request Type | DELETE |
| Request URL | https://server:5000/Sessions/12345678 |
| Request Header | sessionToken: abc123abc123abc123 |
Session Delete Request (Log Off)
¶ Making Calls to the API
Using the session token, calls to the API can proceed and will be performed under the authentication context of the user who created the session.
¶ CRUD Operations
¶ Create
In order to create a record using the API, we must pass the resource data in the body of the POST request. The resource being created will not have certain fields which are generated by the system (id, lastUpdateDate, updateKey, etc). Note that the URL is the root URL for the resource (not including an ID) since we don't yet know the ID.
+------------------+--------------------------------------------------------------------------------------------------------------------------------------------------+
|
|Contact POST Request |
+------------------+--------------------------------------------------------------------------------------------------------------------------------------------------+
|Request Type |POST |
+------------------+--------------------------------------------------------------------------------------------------------------------------------------------------+
|Request URL |https://server:5000/Contacts/ |
+------------------+--------------------------------------------------------------------------------------------------------------------------------------------------+
|Request Header|sessionToken: abc123abc123abc123 |
+------------------+--------------------------------------------------------------------------------------------------------------------------------------------------+
|Request Header|\ |
| |Accept: application/json |
+------------------+--------------------------------------------------------------------------------------------------------------------------------------------------+
|Request Header|Content-Type: application/json |
+------------------+--------------------------------------------------------------------------------------------------------------------------------------------------+
|Request Body |{ "firstName":"John", "middleName":"", "lastName":"Doe", "salutation":"Mr.", "sortBy":"doeJoh", |
| | |
| |"useEntityAddress":true, "addressLine1":"123 Main Street", "addressLine2":"Suite 200", "city":"Boulder", "state":"CO", "postalCode":"80301", ... }|
+------------------+--------------------------------------------------------------------------------------------------------------------------------------------------+
Contact POST Request
The response would be the newly validated and created object with a standard 200 response.
+-------------------+-----------------------------------------------------------------------------------------------------------------------------------------------------------------------------------------------------------+
|
|Contact POST Success Response |
+-------------------+-----------------------------------------------------------------------------------------------------------------------------------------------------------------------------------------------------------+
|Response Status|200 OK |
+-------------------+-----------------------------------------------------------------------------------------------------------------------------------------------------------------------------------------------------------+
|Response Header|Content-Type: application/json |
+-------------------+-----------------------------------------------------------------------------------------------------------------------------------------------------------------------------------------------------------+
|Response Body |{ "id":"567", "updateKey": "A5F0AF7A43136B2840255F1225549B31", "firstName":"John", "middleName":"", |
| | |
| |"lastName":"Doe", "salutation":"Mr.", "sortBy":"doeJoh", "useEntityAddress":true, "addressLine1":"123 Main Street", "addressLine2":"Suite 200", "city":"Boulder", "state":"CO", "postalCode":"80301", ... }|
+-------------------+-----------------------------------------------------------------------------------------------------------------------------------------------------------------------------------------------------------+
Contact POST Success Response
If any of the required or validated fields do not meet the system requirements, a 400 Bad Request is returned with an error messages containing the validation error messages:
| Contact POST Error Response | |
|---|---|
| Response Status | 400 Bad Request |
| Response Header | Content-Type: application/json |
| Response Body |
Contact POST Error Response
¶ Read
So a simple contact GET request will have the following format:
| Contact GET Request with ID 123 | |
|---|---|
| Request Type | GET |
| Request URL | https://server:5000/Contacts/123 |
| Request Header | sessionToken: abc123abc123abc123 |
| Request Header | Accept: application/json |
The response would be an HTTP 200 response with the body containing a JSON representation of the contact with id 123: Contact "123" Response Object
{
    "id": 123,
    "updateKey": "A5F0AF7A43136B2840255F1225549B31",
    "firstName":"John",
    "middleName":"",
    "lastName":"Doe",
    "salutation":"Mr.",
    "sortBy":"doeJoh",
    "useEntityAddress":true,
    "addressLine1":"123 Main Street",
    "addressLine2":"Suite 200",
    "city":"Boulder",
    "state":"CO",
    "postalCode":"80301",     ...
}
¶ Update
Updates are similar to creates, except the data contains a few additional fields needed for proper updating in Eclipse:
| Required PUT Fields | |
|---|---|
| Field | Description |
| id | The ID of the record to update for the resource |
| updateKey | Hash of the old record at the time of read (generated by Eclipse and returned on any GET) |
Required PUT Fields
IMPORTANT!!: Send the entire object retrieved from the GET during PUT calls. Any fields NOT included will be assumed to be blank and removed from Eclipse when updating the passed object! If a field is not available in the API, it will be preserved on the host, but all fields in the object should be set as they were from a GET. We do not yet have a PATCH style update available in the API.
The API uses optimistic locking to prevent multiple users from altering the same data at the same time. The updatekey is our way of handling concurrency in the API. In the API, we record a unique update key based on the data in the record. Any change to data in the file causes the updatekey to change. The update key is returned as part of the record when its retrieved, and must match the current record updatekey for the update to successfully occur. If another user updates the record after you have retrieved it, your update will fail because the updatekeys don’t match. You would have to retrieve the current record again, make the changes again, and submit with the new updatekey. The updatekey is essentially a checksum of the record on disk. So any change to the record will cause the updatekey to change. Note: there are some fields not updateable from the API which will be ignored during updates.
The full request is very similiar to the POST request, except for the required fields and the ID in the URL:
+------------------+----------------------------------------------------------------------------------------------------------+
|
|Contact PUT Request with ID 123 |
+------------------+----------------------------------------------------------------------------------------------------------+
|Request Type |PUT |
+------------------+----------------------------------------------------------------------------------------------------------+
|Request URL |https://server:5000/Contacts/123 |
+------------------+----------------------------------------------------------------------------------------------------------+
|Request Header|sessionToken: abc123abc123abc123 |
+------------------+----------------------------------------------------------------------------------------------------------+
|Request Header|Accept: application/json |
+------------------+----------------------------------------------------------------------------------------------------------+
|Request Header|Content-Type: application/json |
+------------------+----------------------------------------------------------------------------------------------------------+
|Request Body |{ "id":"567", "updateKey": "A5F0AF7A43136B2840255F1225549B31", "firstName":"John", "middleName":"", |
| | |
| |"lastName":"Doe", "salutation":"Mr.", "sortBy":"doeJoh", "useEntityAddress":true, "addressLine1":"123 Main|
| | |
| |Street", "addressLine2":"Suite 200", "city":"Boulder", "state":"CO", "postalCode":"80301", ... } |
+------------------+----------------------------------------------------------------------------------------------------------+
¶ Delete
Deletes are supported by many of the resources in the API if the user/client has permission to perform a delete in the Eclipse ERP. Just like the screens within the ERP, some API endpoints do NOT support deletes and the API server will return a "Method Not Supported" error.
| Contact DELETE Request with ID 123 | |
|---|---|
| Request Type | DELETE |
| Request URL | https://server:5000/Contacts/123 |
| Request Header | sessionToken: abc123abc123abc123 |
| Request Body | {} |
The delete operation does not require the record to be passed in the body of the request. The standard response for a successful DELETE is a 200 OK response with no body.
¶ Connect Specifics
- Saved Args
- API Base URL Address
- API Username
- API Password
- SQL is not built into Connect
- To access the read only data, you will need to use a separate module
¶ Known Customizations
- ARA
-
The client provided SQL Views to access the Customers and ARA Invoices (Read Only)
-
¶ Outlying Issues
- A lot of the API models are not currently implemented
- However, the models are bulk imported from a bulk JSON file
- To implement a new API model into Eclipse, you will have to find the model in the entity types and add the record attribute. Then you are going to have to test that endpoint because the swagger models are not necessarily 100% accurate.
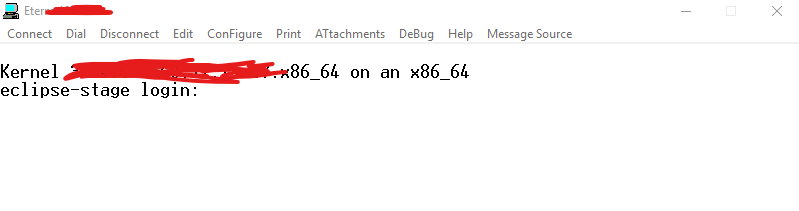
¶ Utilizing Epicor Eclipse UI
You will require an eclipse username and password to access the terminal
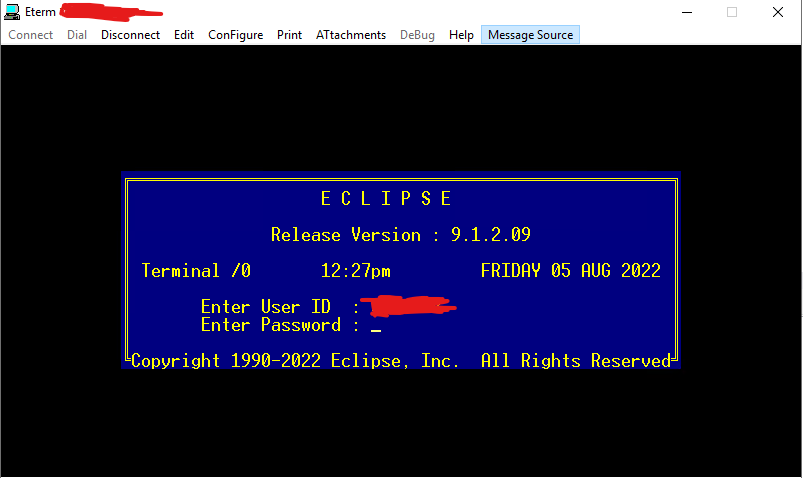
Once you have successfully logged in, you will be required to asked to select a printer. Choose the first option unless the client requires you select a specific one.


Once you hit enter on the Account Login staging, you will gain access to the main Terminal
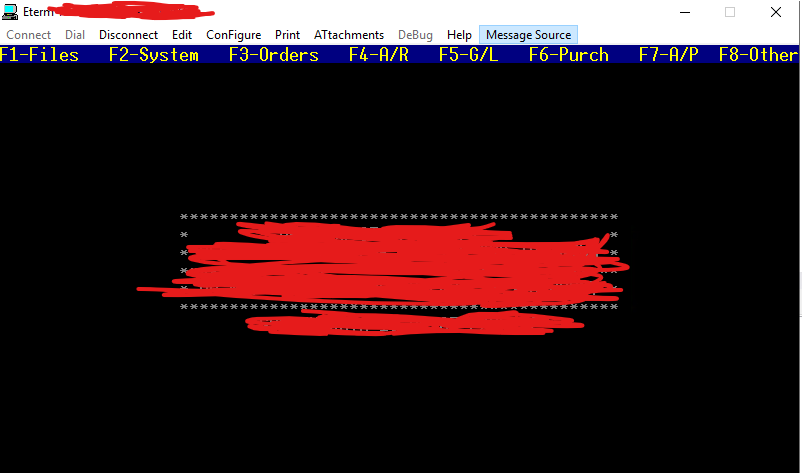
Eclipse works off of Hotkeys to navigate
EX: Selecting F4 will bring up accounts receivable
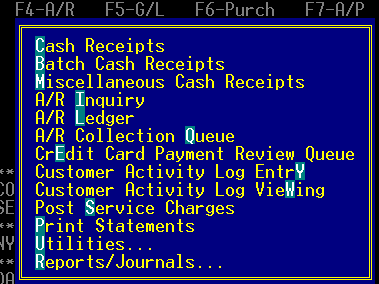
The highlighted Letters are the key you can press to access the specific item from the menu
EX: Pressing "C" will navigate you to Cash Receipts
¶ Callouts
- Some menus will require you to hold "ALT" and then the highlighted key to select the option
- There are 2 key binds going back to the previous window
- ESC will save what ever changes you have made and navigate you back
- F12 navigates you back without saving
¶ Documentation
Instructional Video on using Eclipse UI (Reading/Creating Cash receipts and viewing invoices)
¶ Common Model Mappings
¶ Common Model Workflows
Phase 2