Marketing dev server: 10.100.250.1
CVI PROD Server: 10.200.20.101(HQ Login)
CVI PROD Failover Server: 10.100.20.103 (HQ Login)
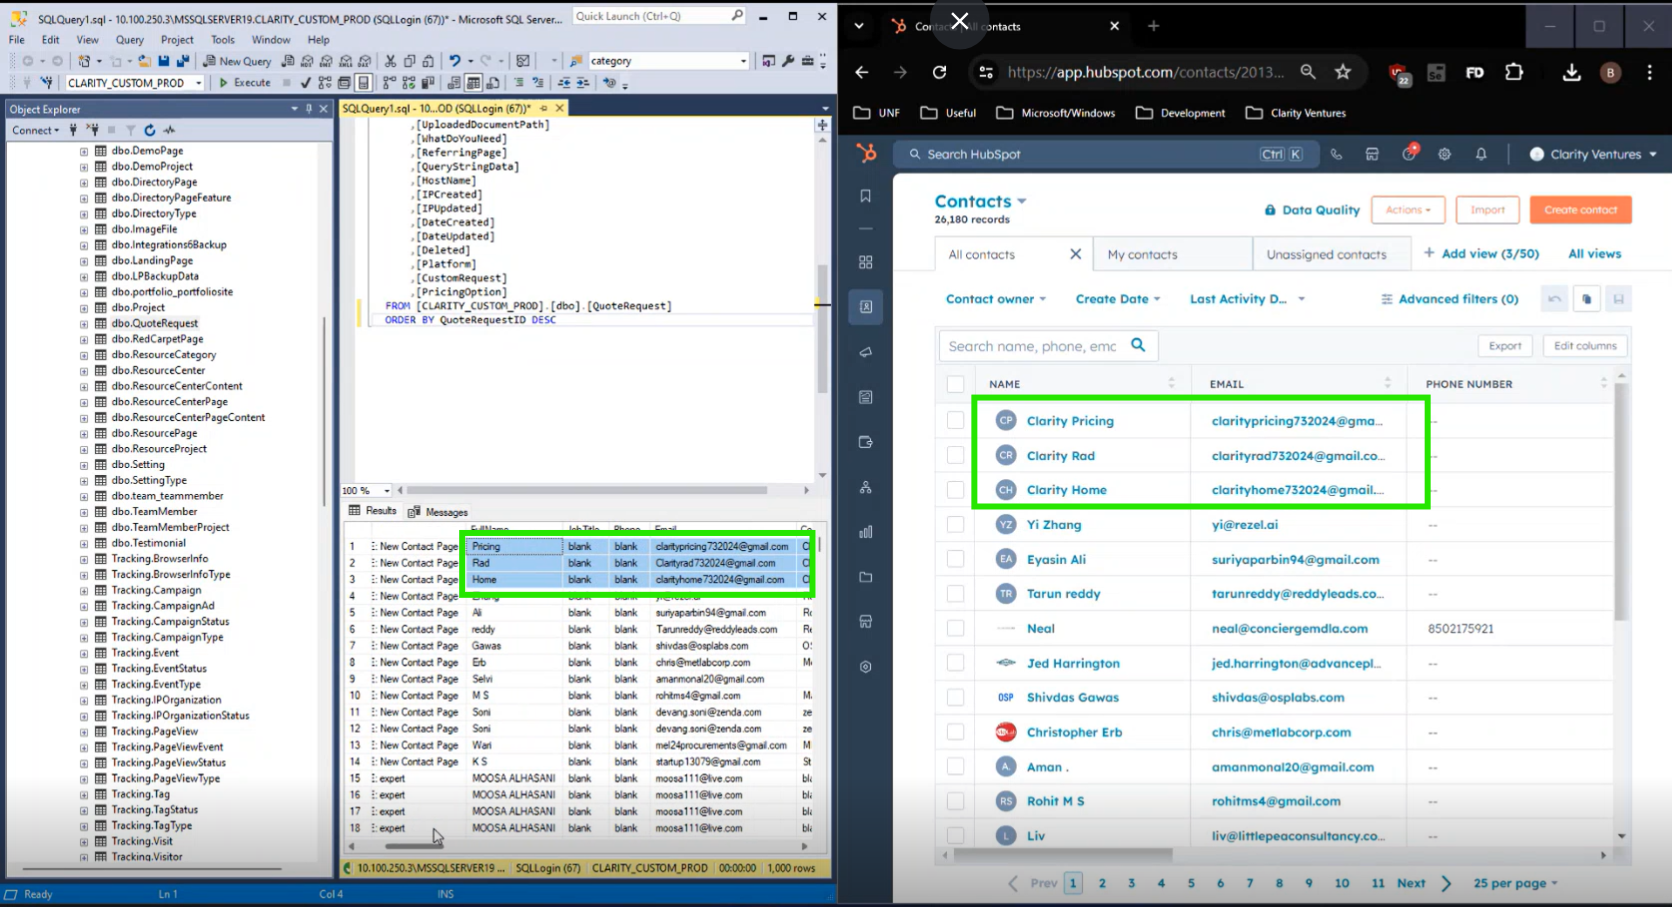
10.100.250.3\MSSQLSERVER19 (SQLLogin Creds)
C:\Data\Tools\CMSManager
https://docs.google.com/spreadsheets/d/1RTcLCxAurOONuvFexxDyHpsjNYN65hNnpIIoFI6u9rU/edit?pli=1&gid=276950825#gid=276950825
\\2019-FILE-1\Clarity\Clarity Ventures\CVI - Clarity Ventures - General\_archive
C:\Data\Projects\repos\ClarityCrawler\SiteExports
https://dash.cloudflare.com/login
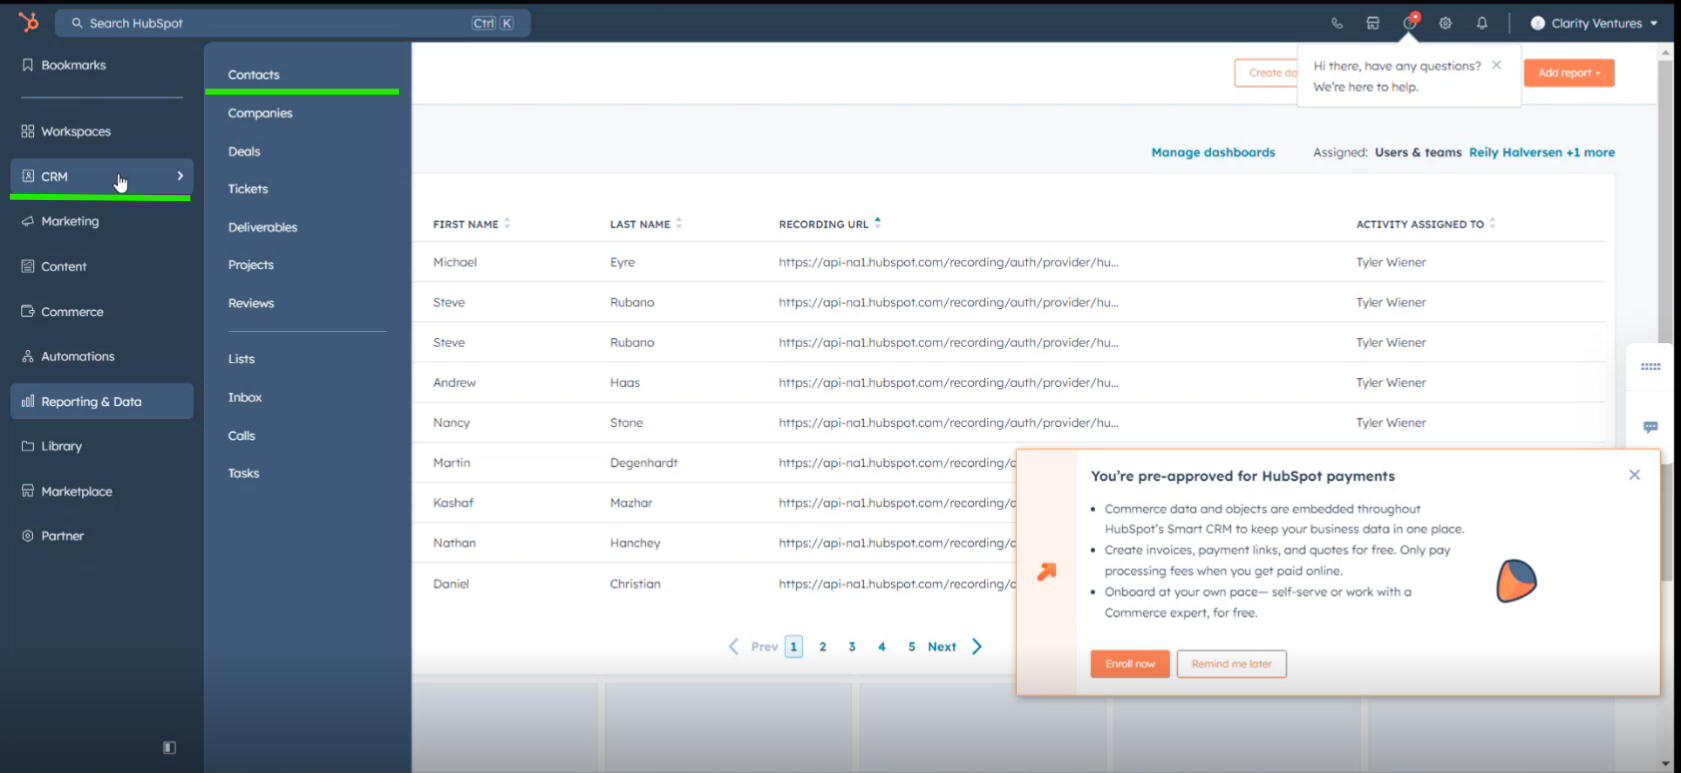
HubSpot Login and Sign in
¶ Initial Hand Off Videos
Video 1
Video 2
¶ October 2024 Hand Off Videos
Video 1
Video 2
Video 3
Video 4
Video 5
Video 6
Video 7
Word Doc
Content Management System | Clarity CMS
cvi-cms-editor.clarityclient.com and cvi-cms-uat.clarityclient.com logins:
U: clarity
P: cl4r1ty
10.100.20.16\SQL2016 (SQLLogin Creds)
https://dev.azure.com/clarity-ventures/CVI-Production-Website-CVI.com
https://dev.azure.com/clarity-ventures/CVI-Production-Website-CVI.com/_git/NextJS-Editor/branches
https://dev.azure.com/clarity-ventures/AI-Projects/_git/AICrawlerTagger?path=%2F&version=GBnet8&_a=contents
10.100.250.20
uses nvm 18.17.0
DBs:
Clarity_Custom_UAT << Latest Data
Clarity_Custom_Redesign << Latest Template
- Sign in to the Marking Dev server
- Open Clarity CMS Manager application @ C:\Data\Tools\CMSManager by right clicking and run as admin. (Pin to your taskbar for future)
- Database Methods tab
- NOTE: if anything disrupts the CMS steps, you need to start from step one when trying again (ie. Backup and Restore UAT Database)
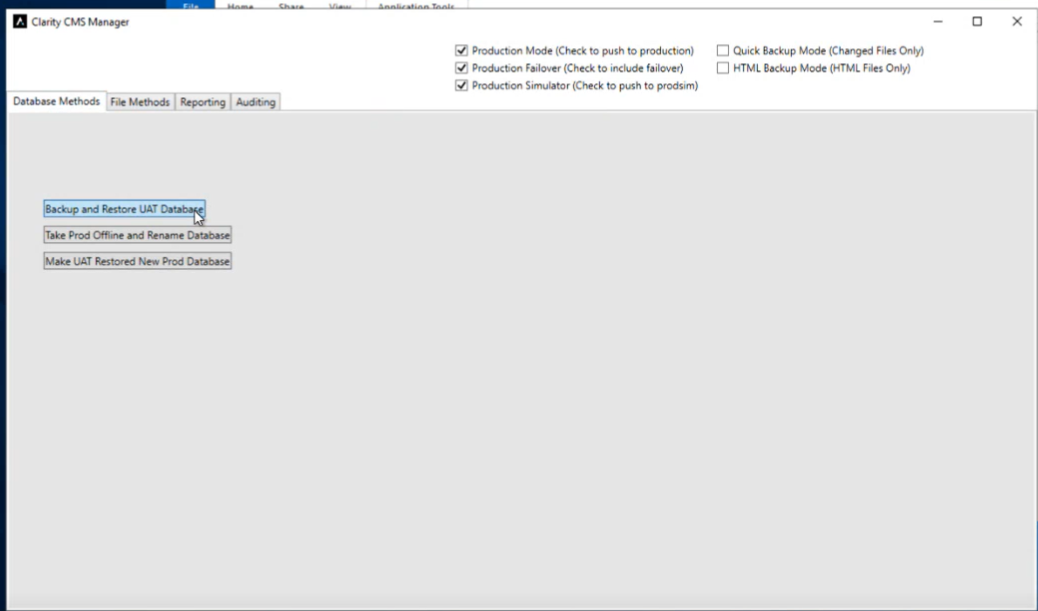
- select Production Mode, Production Failover, and Production Simulator checkboxes
- Click Backup and Restore Uat Database (Buttons remain blue while in progress. Will see success message on success)
4521e73d-eba4-4026-a3f1-e00a9ee13499.png
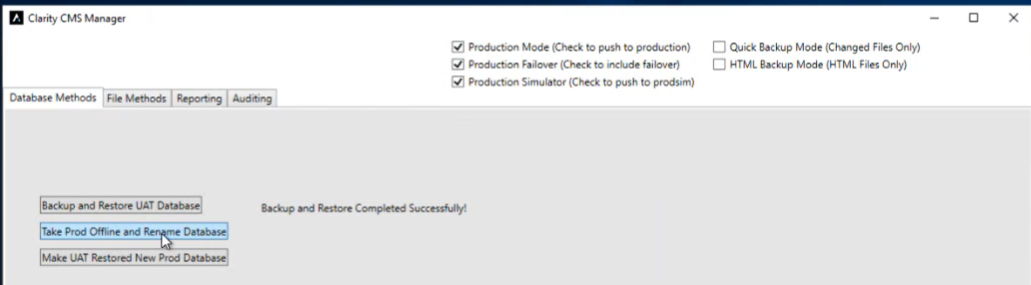
- Click Take Prod Offline and Rename Database (Will see success message on success)
4c5727b3-567f-4ae3-bd01-63e0ae5a1c06.png
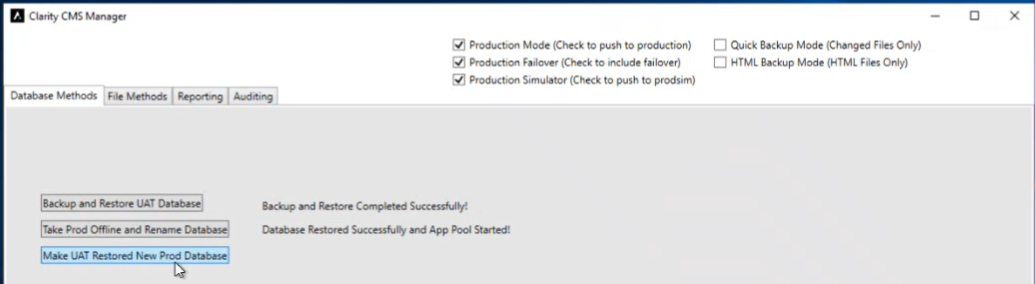
- Click Make UAT Restored New Prod Database. This one doesn't show success message.
cde0f2ca-e503-4bde-acca-c3f94b82170c.png
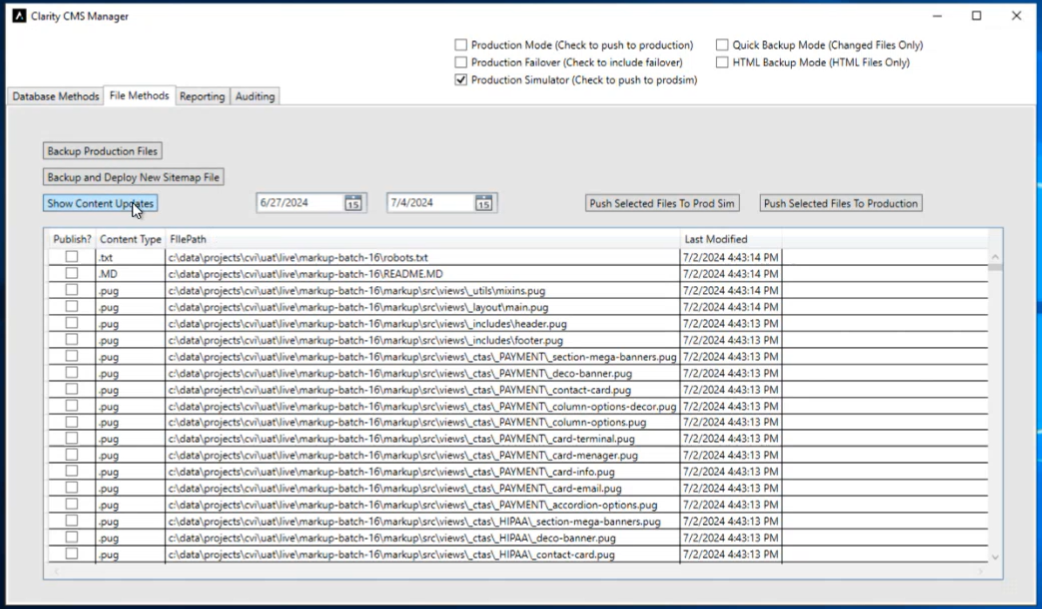
- File Methods Tab
- NOTE: It is important to do this in the right order.
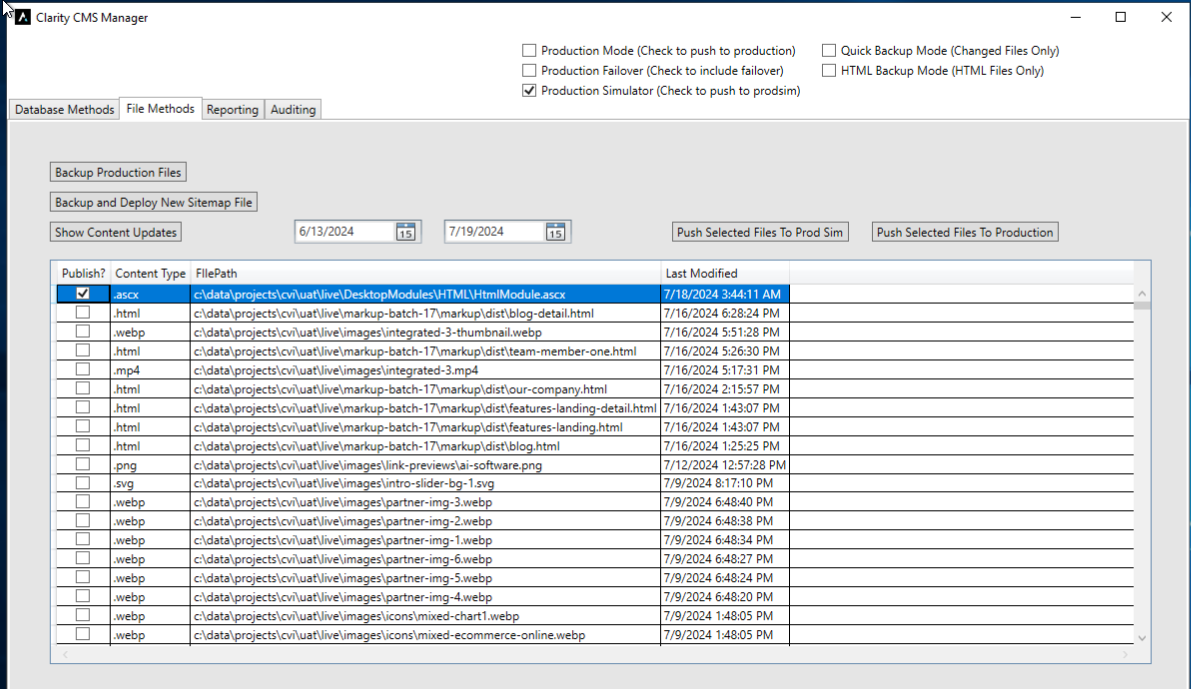
- Only check Production Simulator checkbox.
- Change the start date to the last push to prod date.
- Click Show Content Updates: These are all of the files that changed since the last push.
2faac513-8e26-42f8-a517-fadde28b6719.png
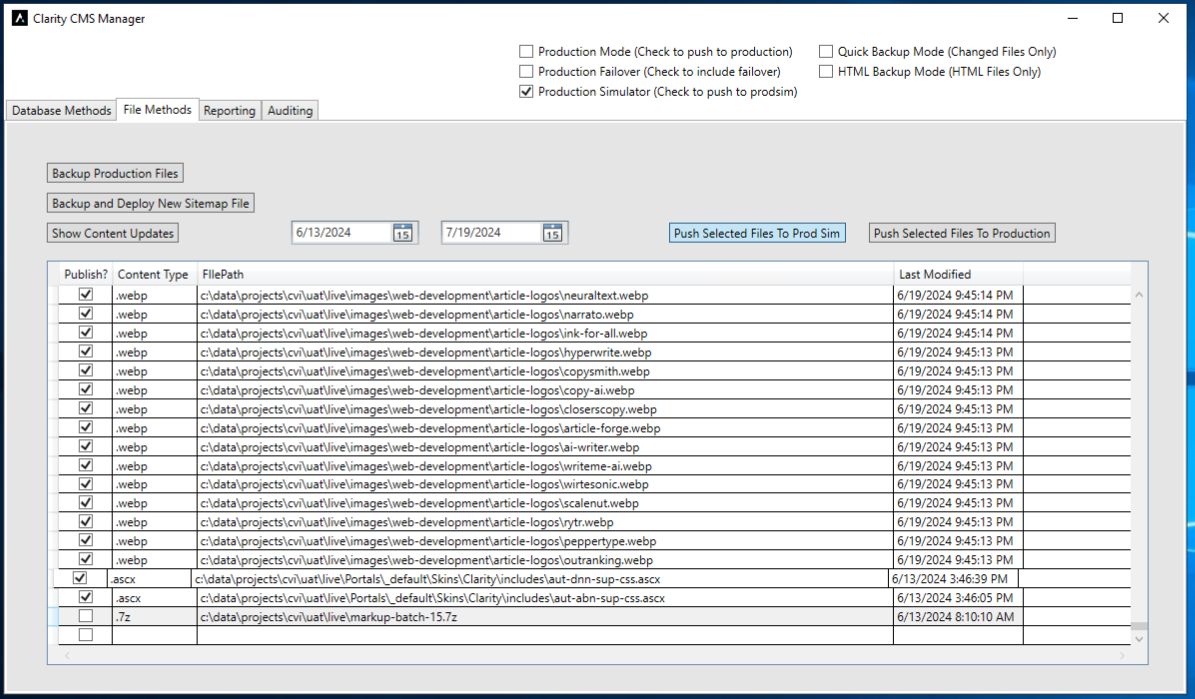
- You want to select everything except for .config files, and anything that you do not want to push up (for example, markup batch files). TIP: click into the checkbox cell next to the checkbox to highlight the row, and hit spacebar to check, then up/down arrow + spacebar through the files to select quickly
a227e370-90cb-43a9-ad39-3c636ea77d01.png
- Once all the files you want are checked, Select Push Selected Files to Prod Sim (Button will stay blue until done).
bdef37a7-52b8-4f5a-9780-adddb368a680.png
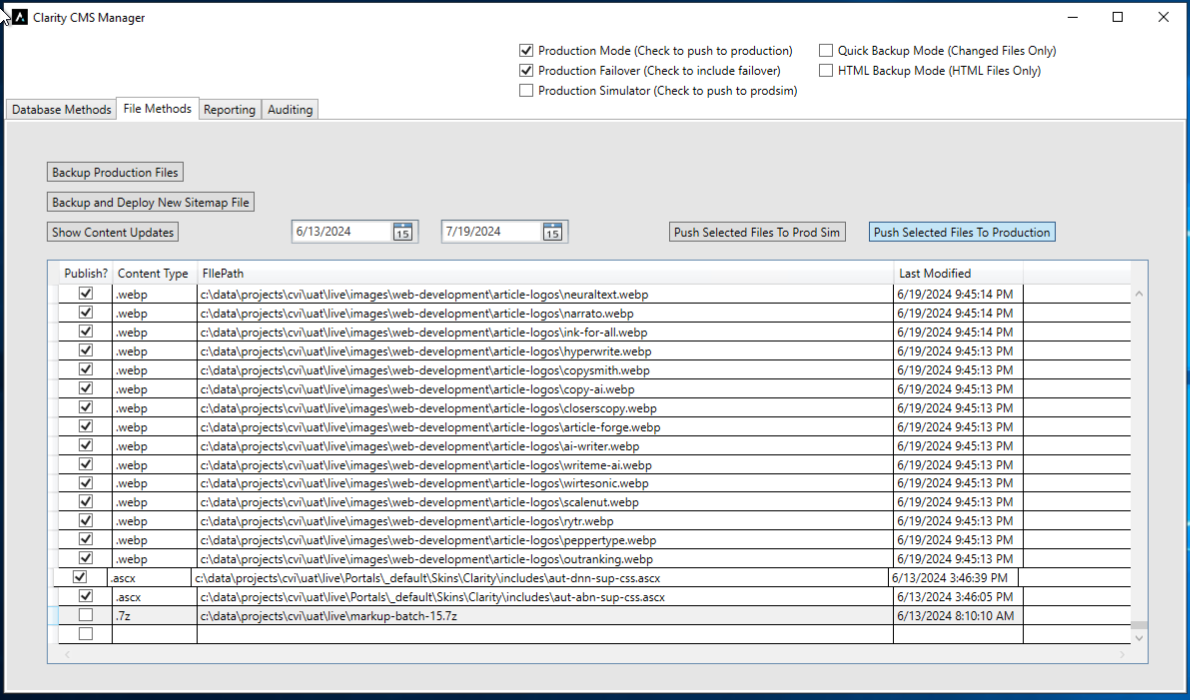
- Once done, uncheck Production Simulator checkbox, and Select Production Mode and Production Failover checkboxes, then click Push Selected Files to Production.
e6f539fb-eaaa-46c6-a7d4-7004ca0f145e.png
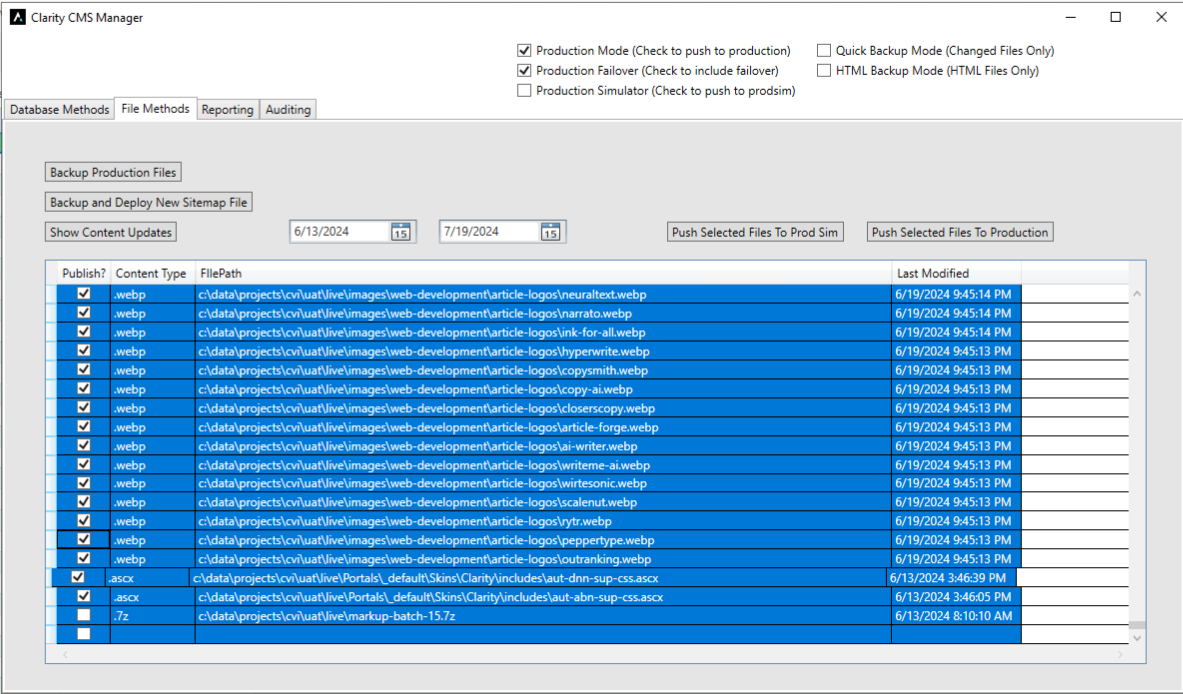
- Click one row and Ctrl + A to select all and Ctrl + C to copy all rows. (You are going to paste this into a google doc that is used to track the history of the files pushed.)
f0605390-2d27-4319-80da-3a4c30675699.png
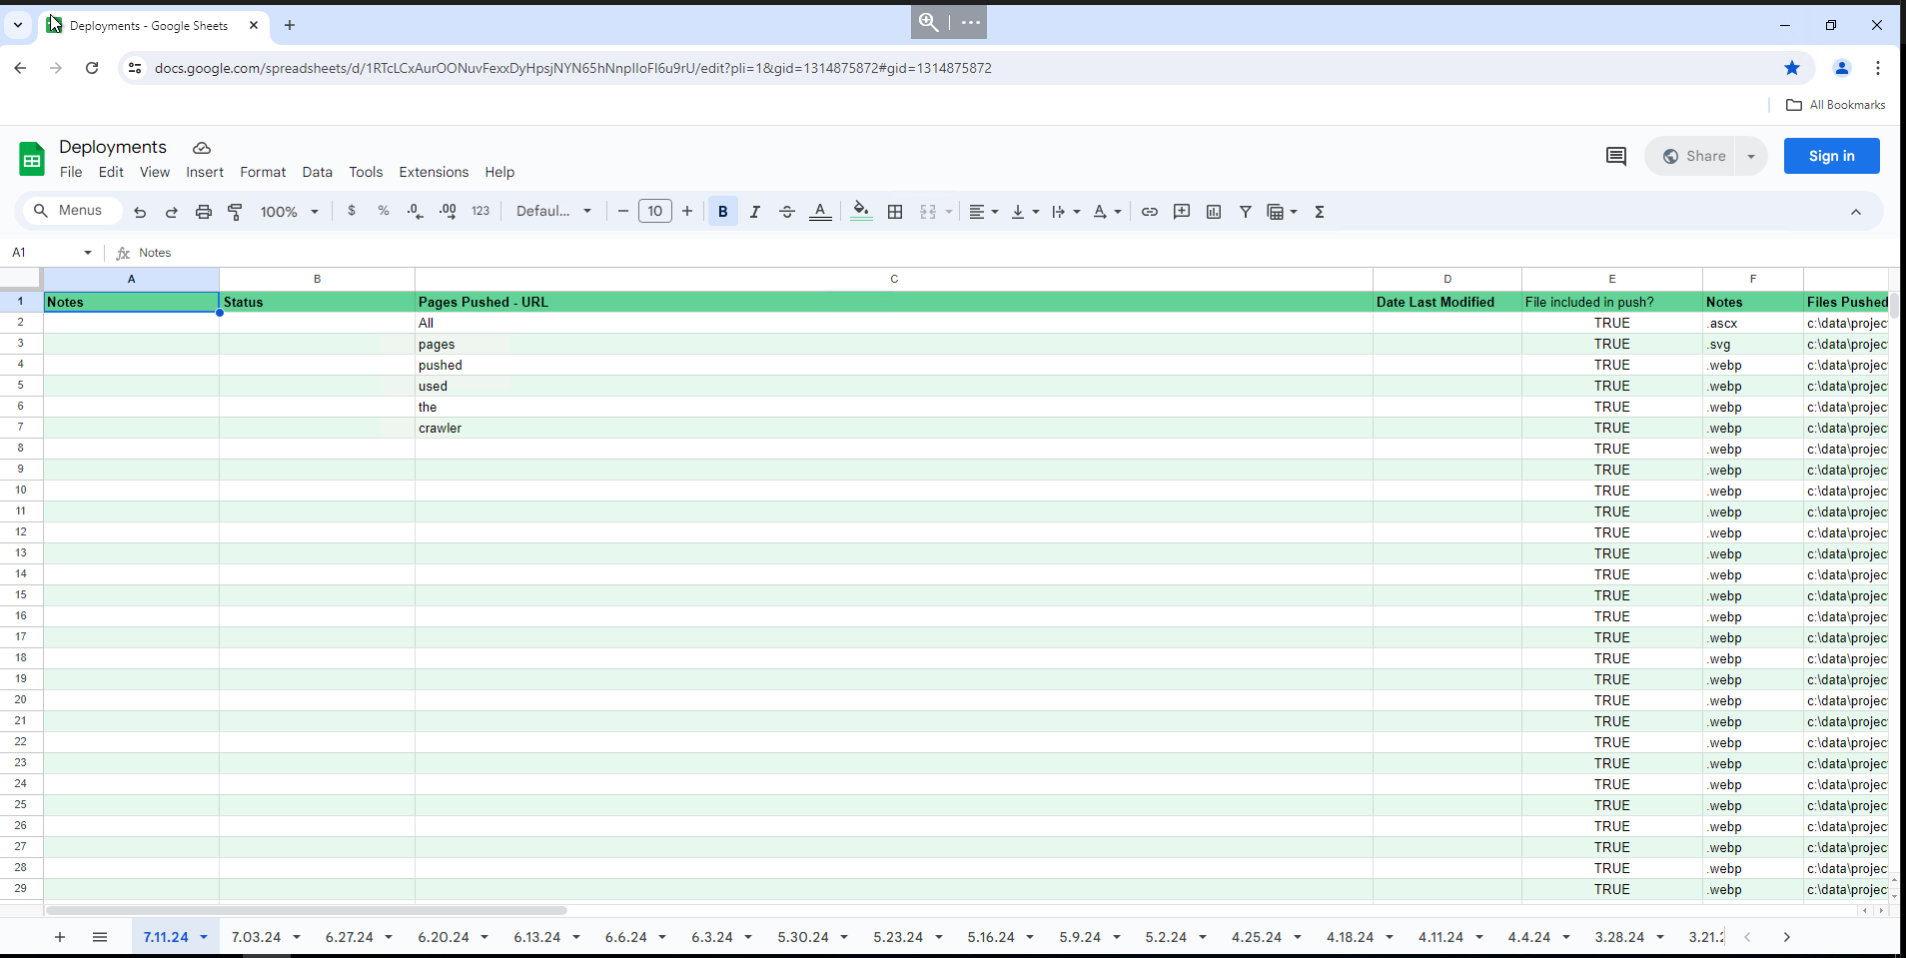
- Open Deployment Google Doc, find most recent tab on bottom, duplicate tab, rename the copy to todays date, and shift that tab all the way to the left so the tabs remain in date order.
7bf7ea4c-4ea3-4028-b899-d0be7a11735e.png
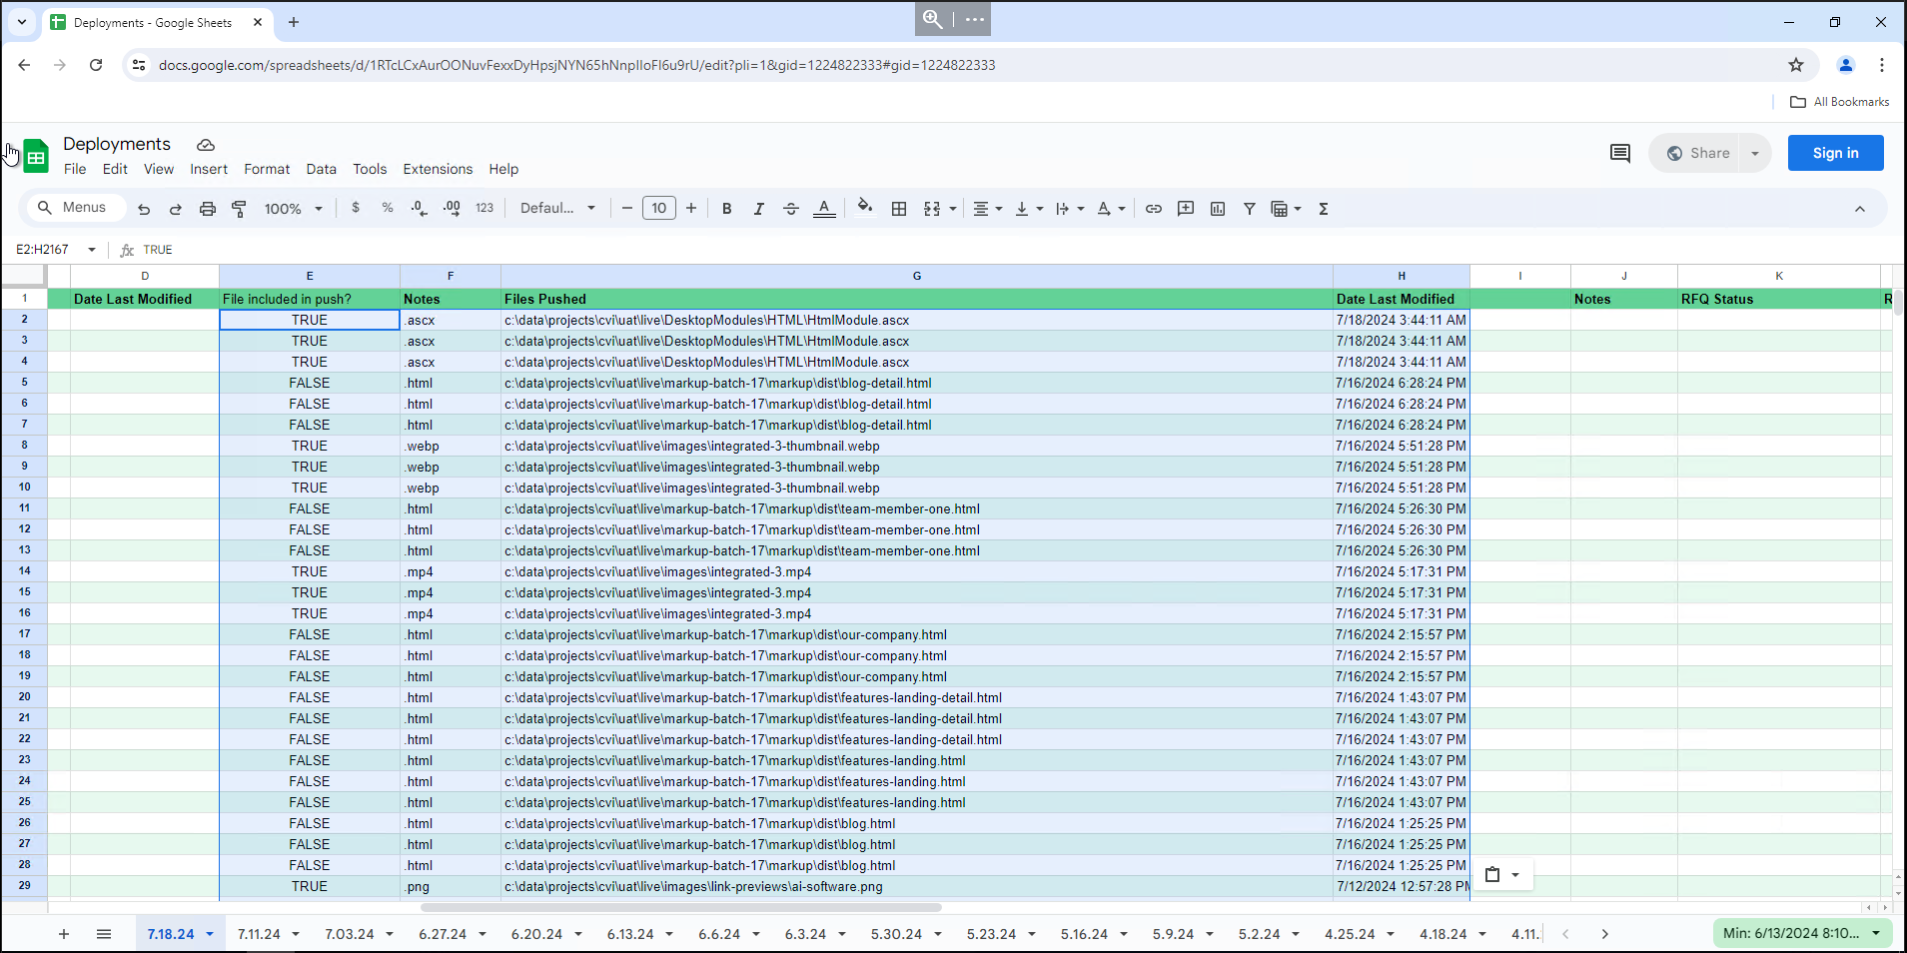
- Replace the row content from "File included in push?" column through "Date Last Modified" column with what you copied from the CMSManager tool, then save.
82fb477e-4cc9-4e46-a1a1-08c89d64dc3c.png
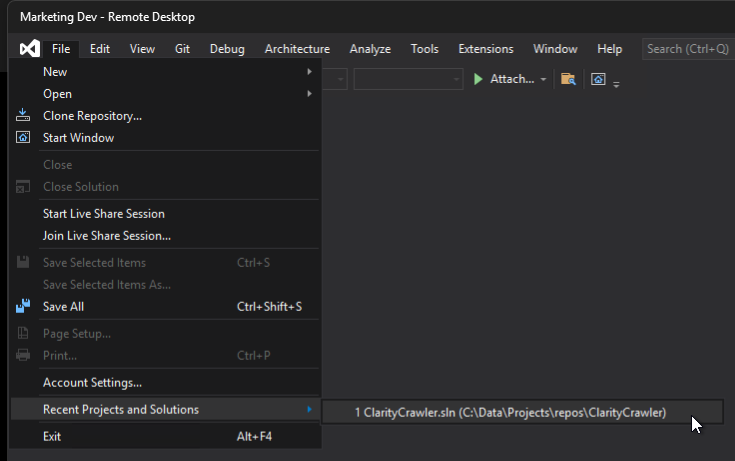
- Close out of everything and Open Visual Studio 2019 as an administrator.
- Open the ClarityCrawler project located at C:\Data\Projects\repos\ClarityCrawler
c47b1d41-4881-4741-a477-831f28f75053.png
- Click the play button next to ClarityCrawler in the top bar.
c5324583-0b64-4b75-93c8-90d1e0bfd945.png
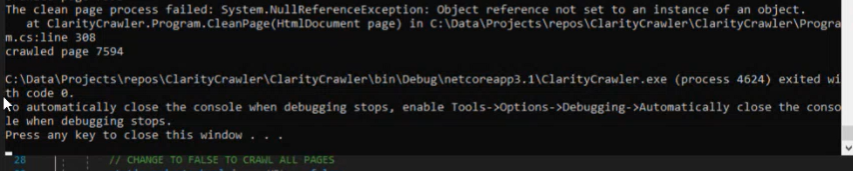
- When it is finished and shows Exited with code 0, it is done. Exit out of VS when it is finished. (Notice there are 7500+ pages in the screen shot. This step takes a little bit to finish.)
42de23bc-cf5a-446c-8008-7019a4dfe315.png
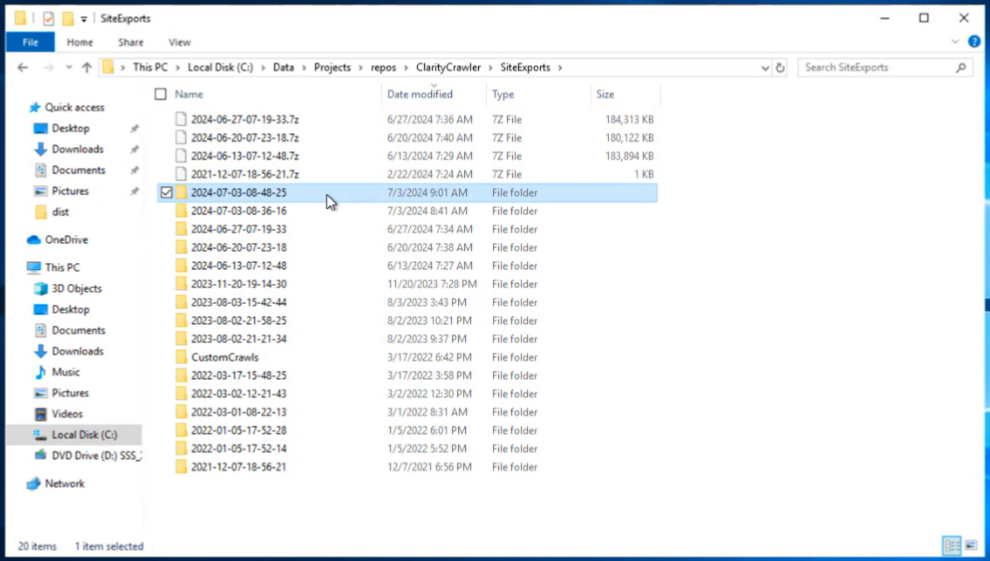
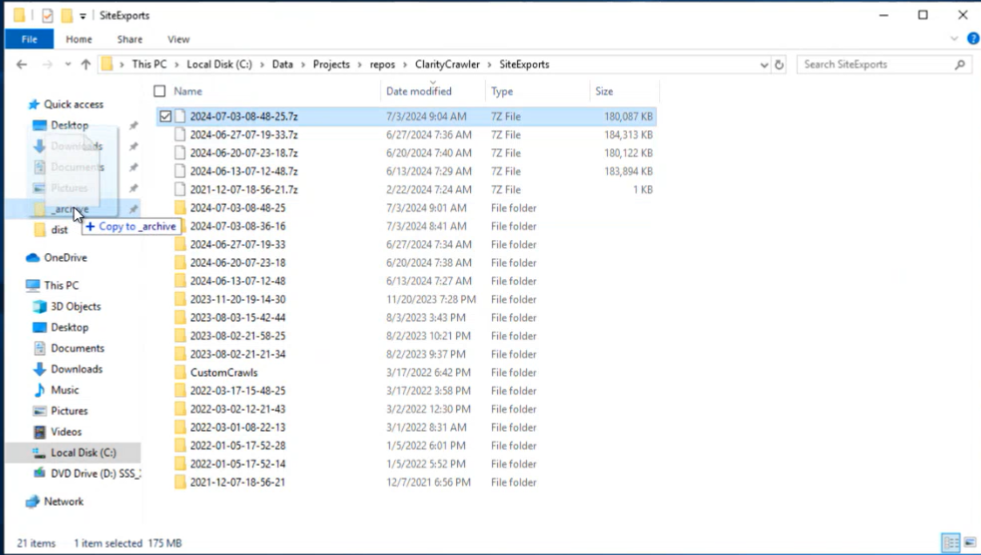
- In file explorer go to C: Data/Projects/repos/ClarityCrawler/SiteExports, sort by date modified (most recent at top), click on the most recent folder.
5c539b8d-7922-472d-ae57-ec10daf4094d.png
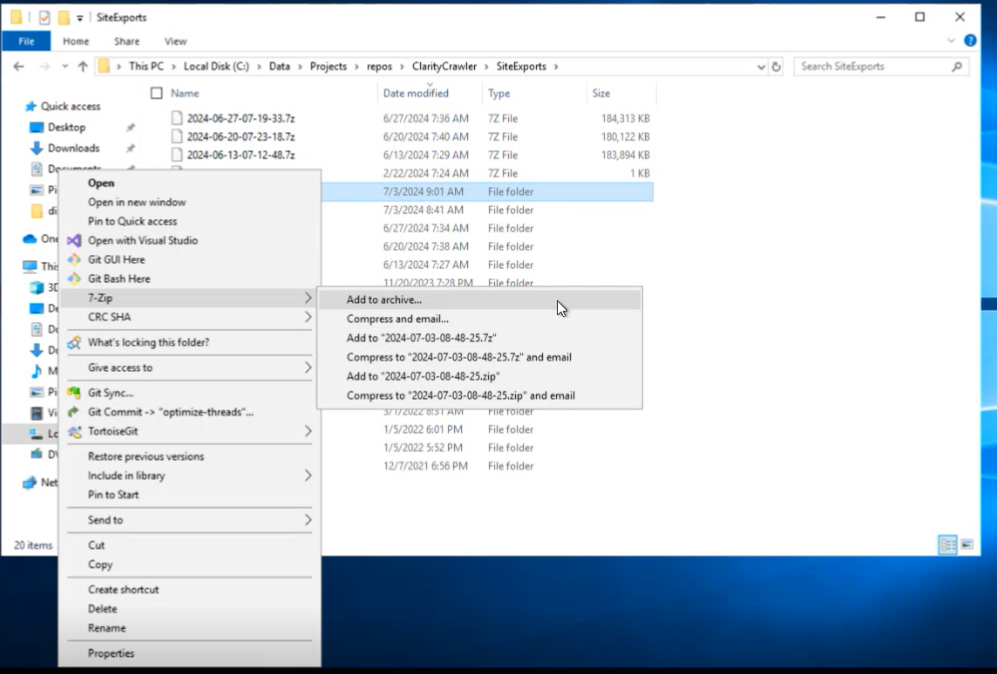
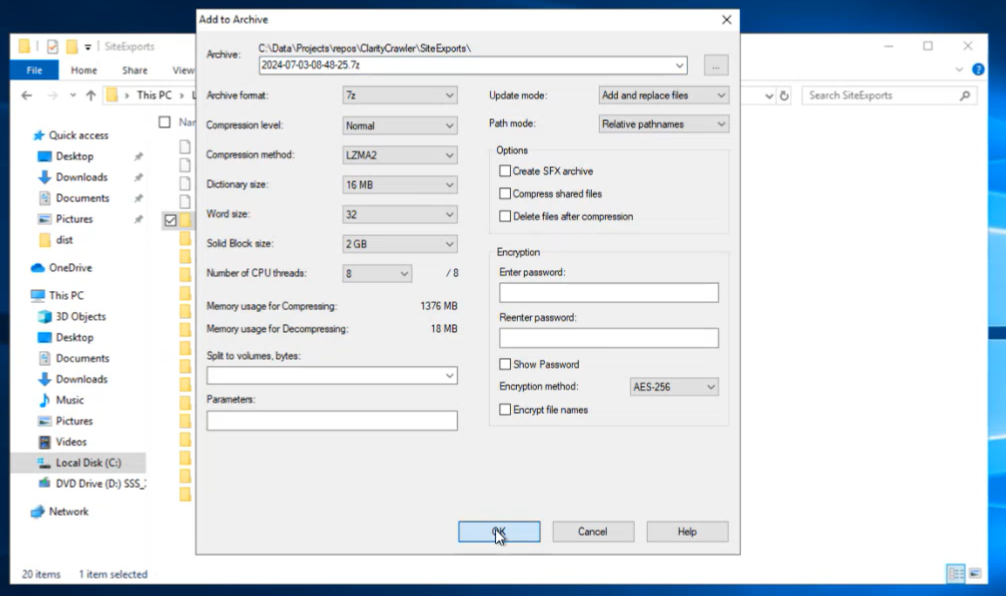
- Right click, 7-Zip, Add to Archive, then click ok.
c03e4a3e-5e3f-49fa-8716-9aa902fca954.png
f4755679-315a-4c74-a36f-600bce120fc5.png
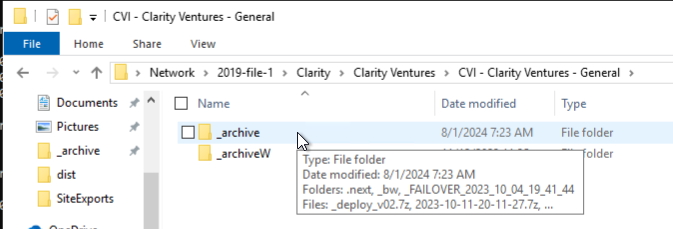
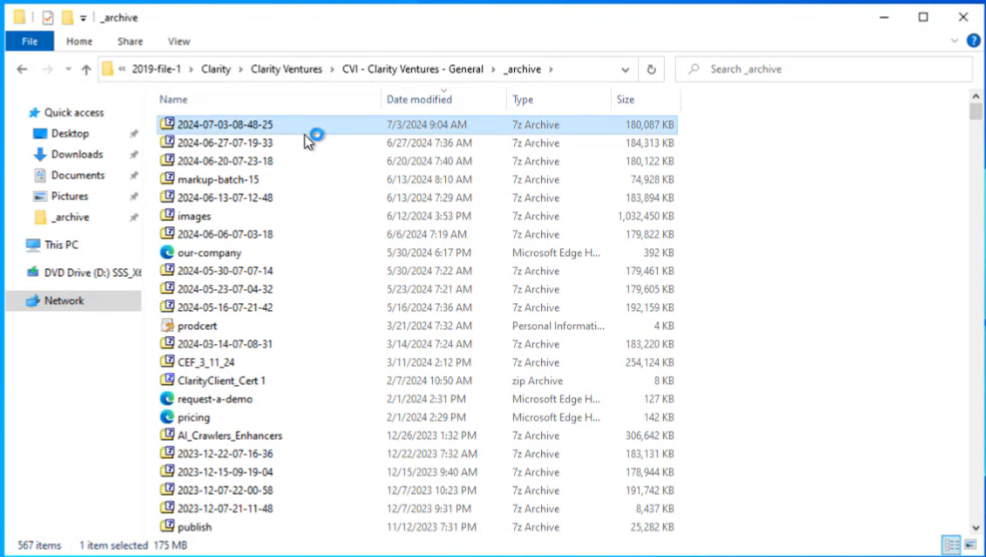
- In another file explorer window, navigate to "//2019-file-1/Clarity/Clarity Ventures/CVI - Clarity Ventures - General" and right click on _archive folder to pin to quick access if you haven't already. Close this window when done.
038601f3-9239-4fe0-adfb-01975e611235.png
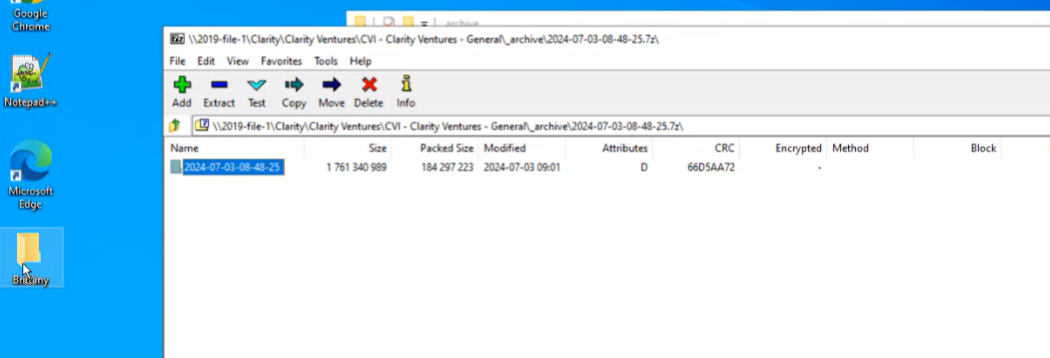
- Back in your other File Explorer window in the Site Exports folder, drag the compressed zip file that was created into the archive folder that is pinned to quick access
427cf9ad-fa3f-4dd8-9229-bd1ce2f7552f.png
- You are now done with the Marketing Dev server. Close out of everything and sign out.
- Sign in to the Marketing Prod server next.
- Sign into the Marketing Failover machine next.
- Repeat the same steps on this machine:
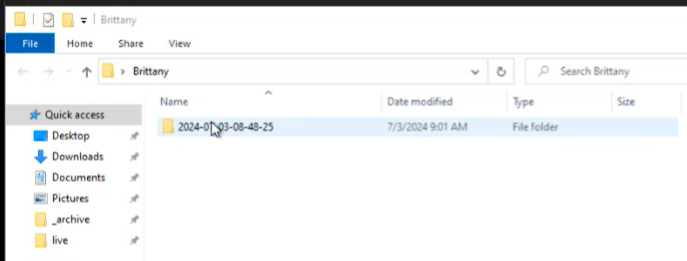
- Get your folders set up if you haven't already, ie folder with your name, and all of your pin to quick access points.
- Open archive folder, and open the recent zip from today, and drag that folder into the folder with your name.
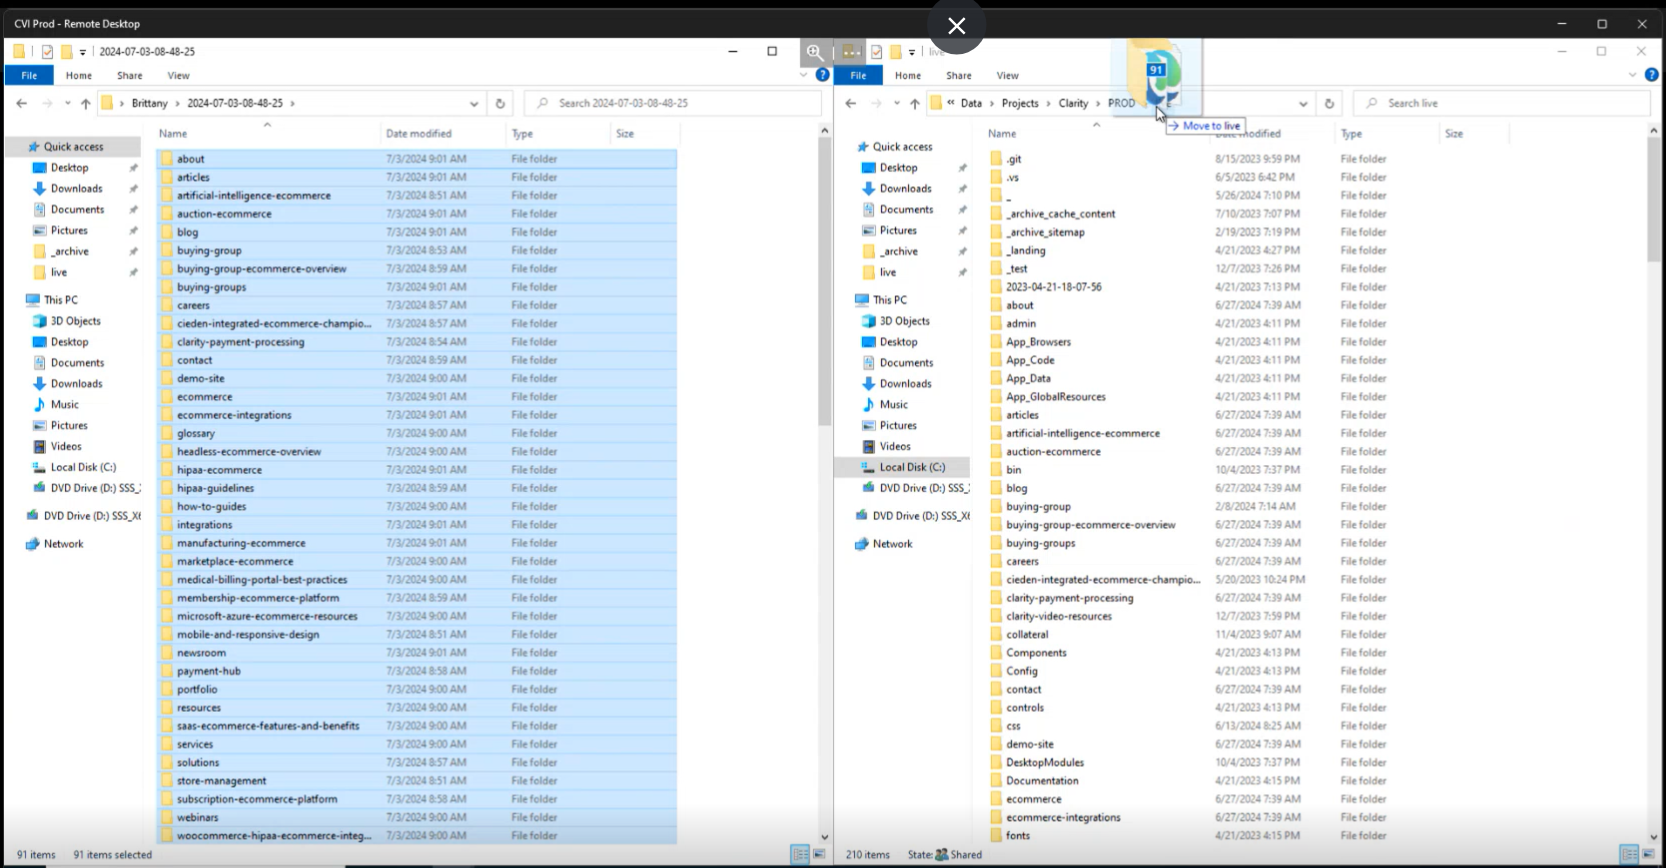
- Open up two file explorers, side by side, one with the folder with your name, the other with the prod/live folder
- In the folder with your name, open the most recent folder and select all to drag over to the prod live folder
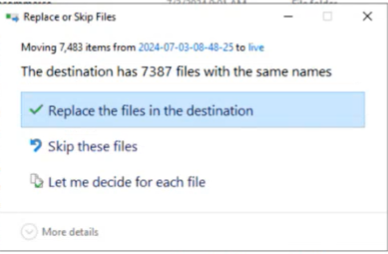
- Confirm to replace files with the same name.
- When done, close out of everything and sign out of this machine.
- The push is done. Now you need to test that everything is working.